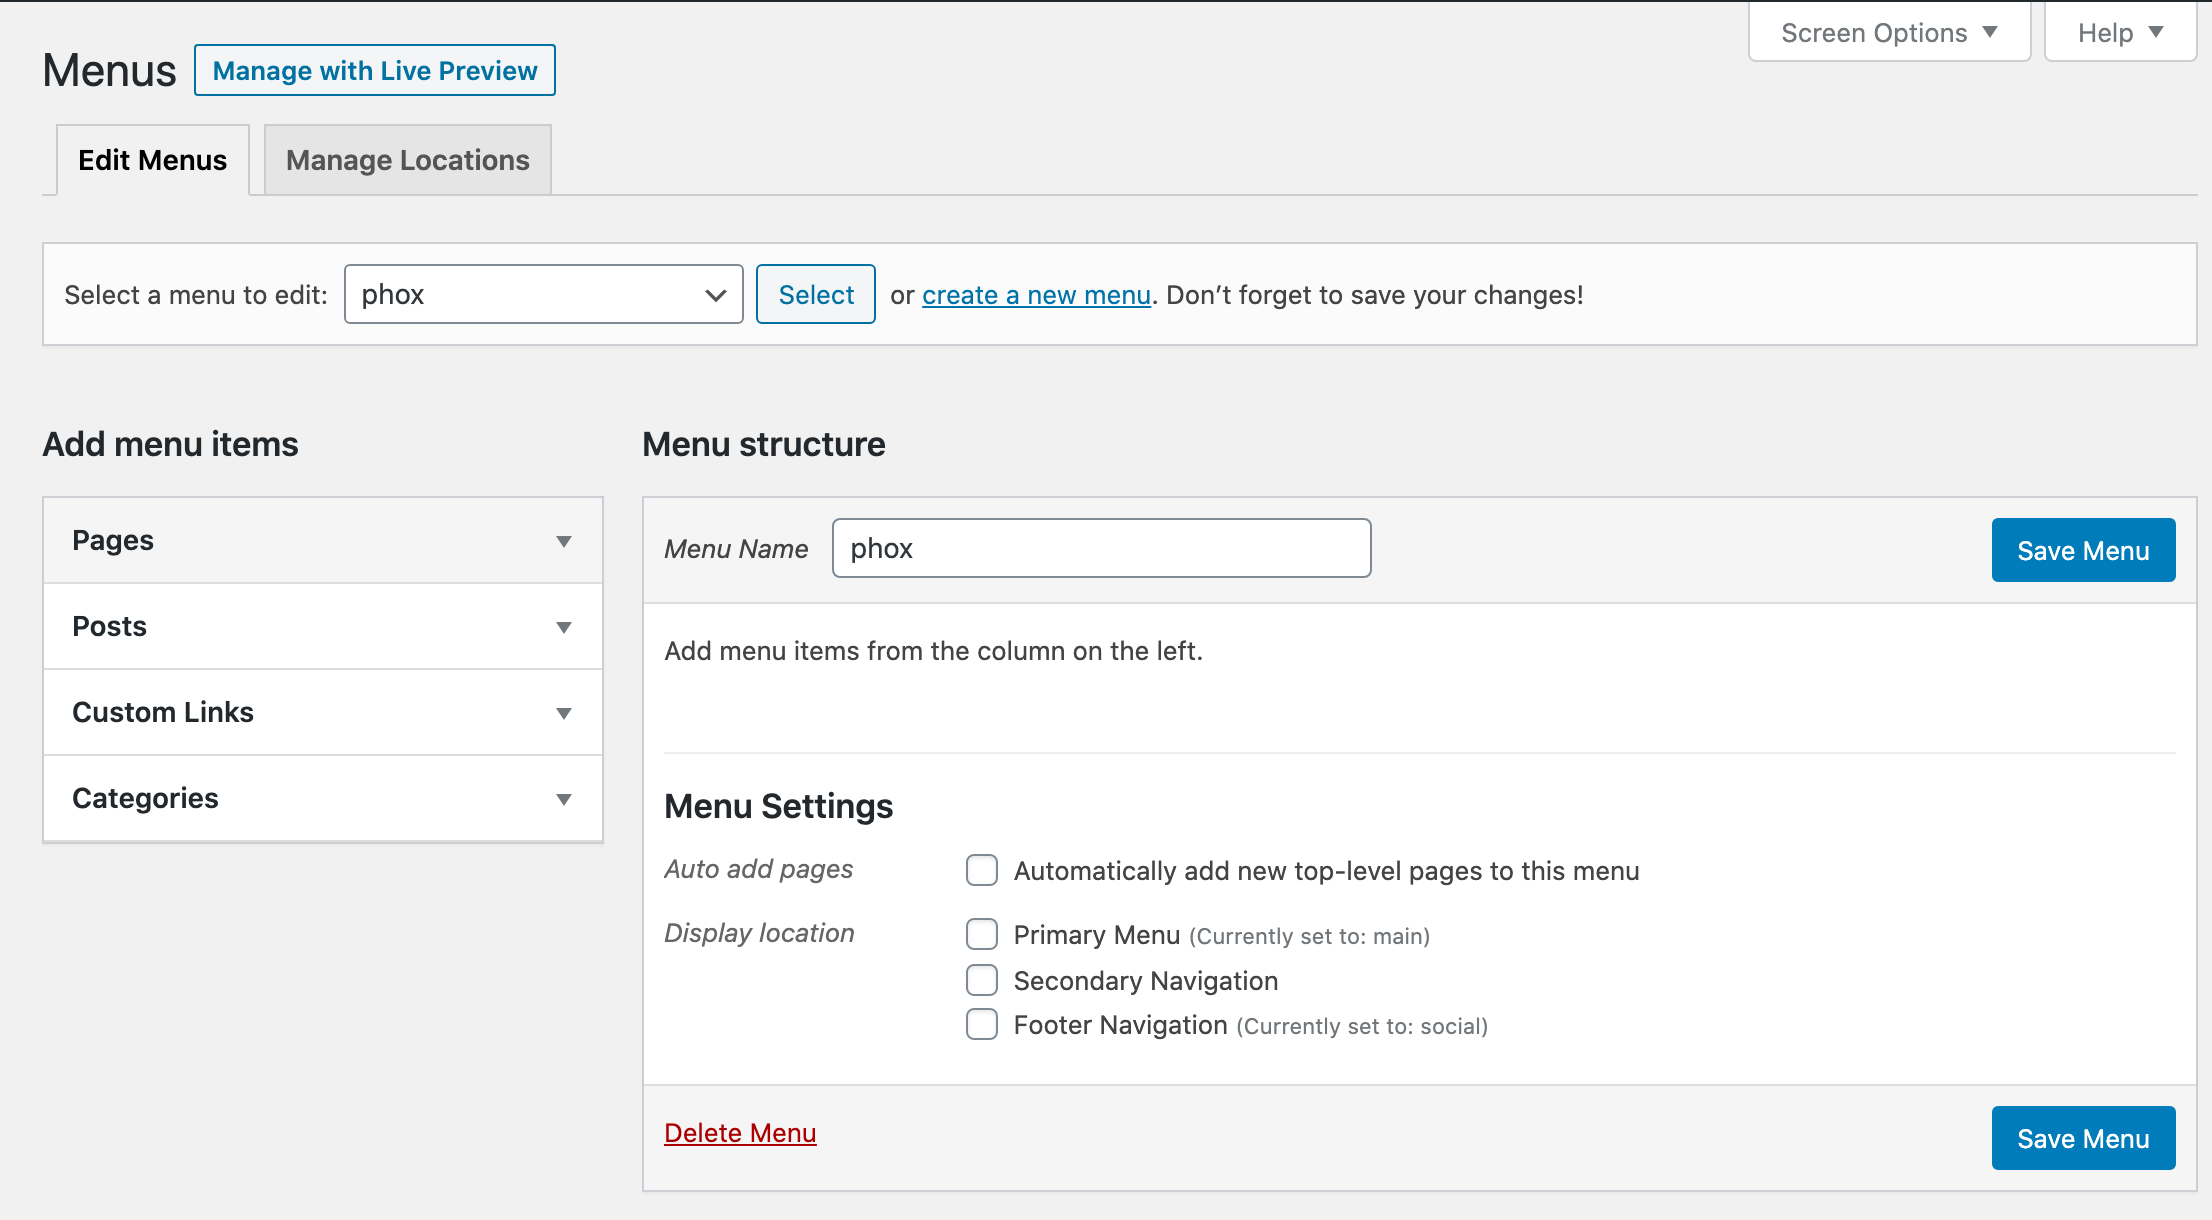
Menus are created in Appearance > Menus from the WordPress dashboard and then assigned to certain areas within the theme.
There are 3 areas where you can assign a menu. These are Primary Menu, Secondary Navigation, and Footer Navigation. Each of these menu locations can have a custom menu assigned to them. Once a menu is created and assigned to the location, it will be used on the frontend for those specified areas.
There are several Menu Options in the menu items themselves.
Phox Menu Locations

- Primary Menu – This is the Main Menu that shows in the Header area.
- Secondary Navigation – This is the top Secondary Menu.
- Footer Navigation – This is the Footer Menu.
How To Setup A New Menu
- Navigate to the Appearance > Menus section of your admin sidebar.
- Click the Create A New Menu link and enter the desired menu name. To save the menu name, click the Create Menu button.
- To add a menu item, select one of your created pages on the left hand side and click the Add to Menu button. You can also add all kinds of different posts from the left side.
- To add a custom menu item, click the “Custom Links” menu item bar, then enter a custom name and URL into the respective text fields and click “Add to Menu.”
- Manage your menus by using the drag and drop functionality. To create a dropdown menu, simply drag a menu item below and slightly to the right of another menu item and it will lock into place. That will set the menu item as child item and automatically appear as a dropdown menu item.
- After setting up your menu, scroll down to the bottom of the page to assign the menu to one of the 3 locations in the Theme Locations box.
- Once its all done, make sure you click the Save button.
Here is a screenshot that shows you the various areas and descriptions of the menu section described above.
Menu Settings
To make the most of your menus, you should be familiar with the various settings and options that come with it. These are a mixture of WordPress core menu functions, and Phox added settings.
There are 2 levels of menu items, the Parent Level (or the First Level menu items) and the Child Level (or sub-level menu items below the Parent Level menu item). There can be up to 4 child levels with Phox.
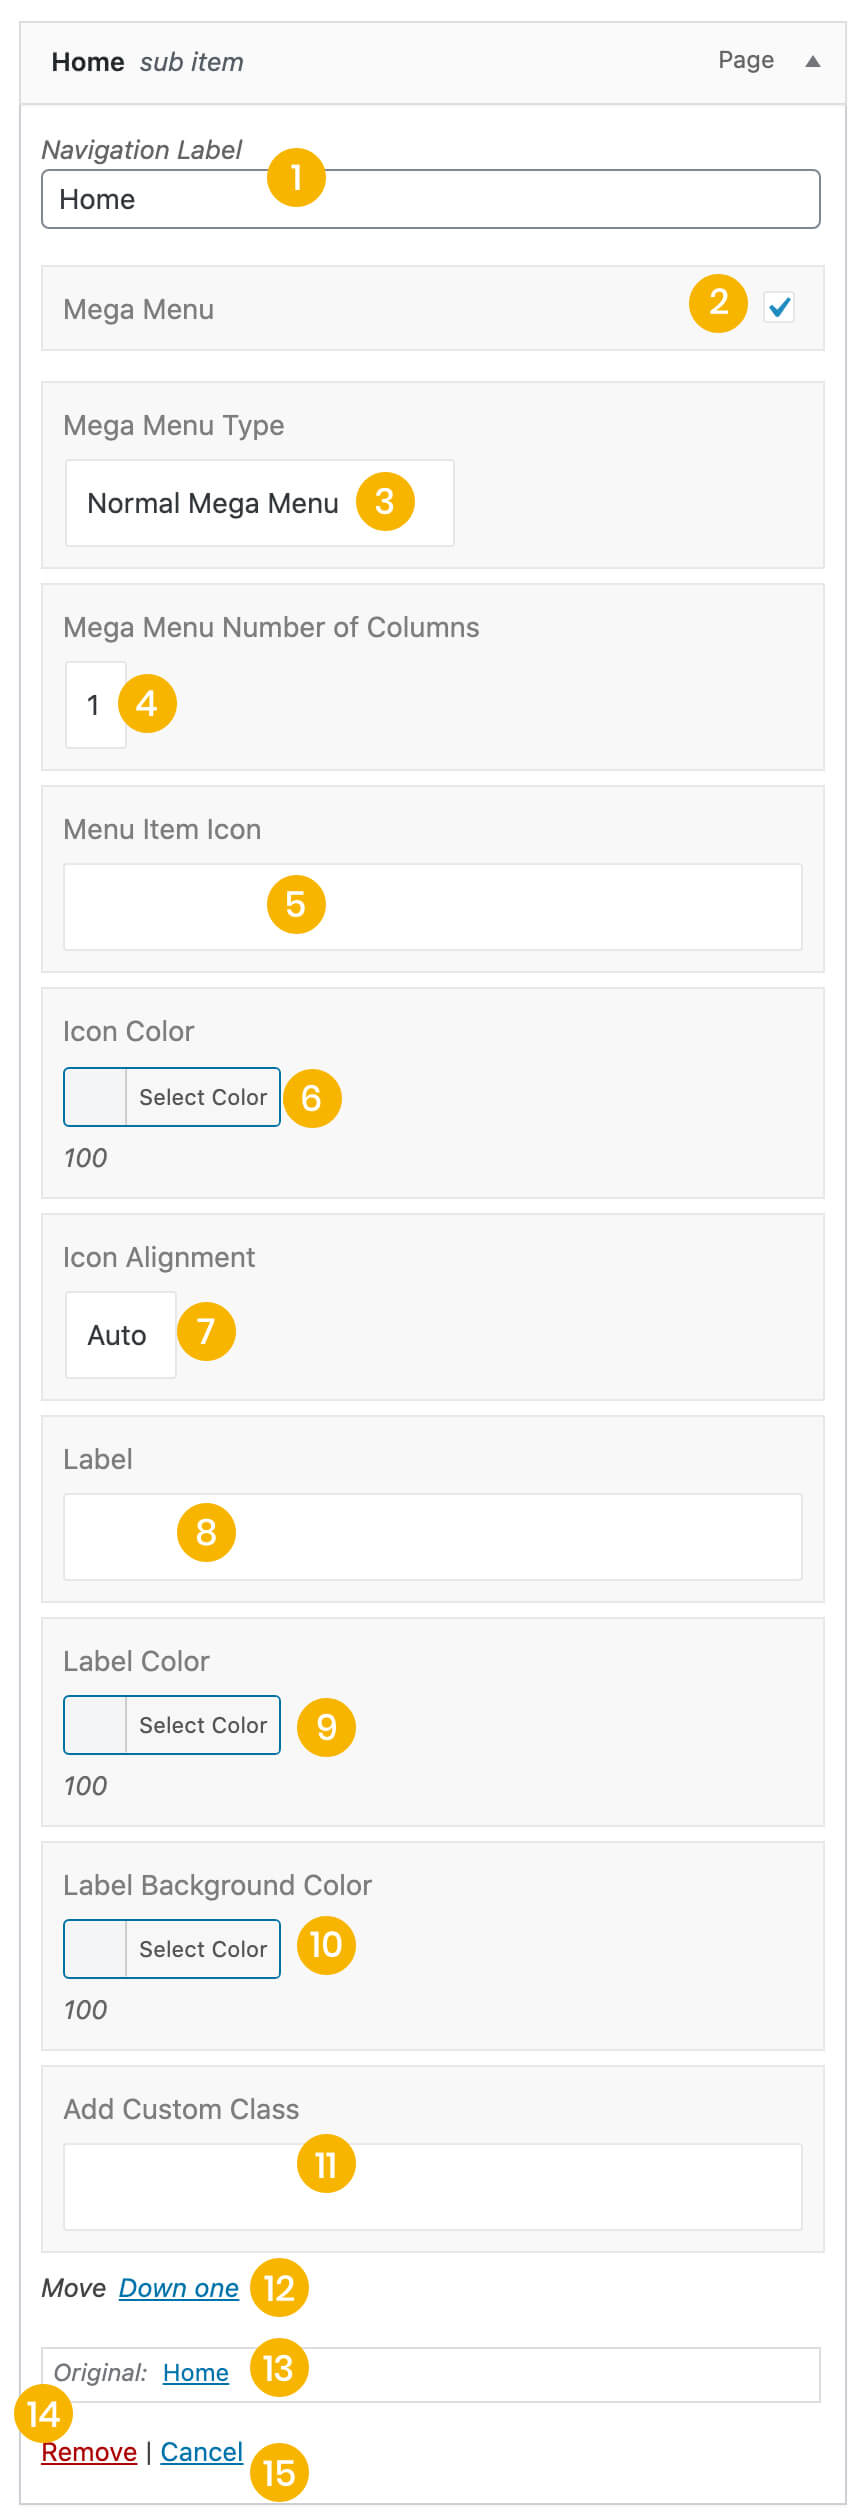
Parent Level Menu Settings
- Navigation Label – Illustrated as 1. It allows you to add a name to your menu item. In this way, you can change the display name of a menu item.
- Mega Menu – Illustrated as 2. check it to enable Mega Menu and override the default menu.
- Mega Menu Type – Illustrated as 3. incase you enabled mega menu you will get 3 types of the mega menu [ Normal Mega Menu, Mega Menu With Widget, Mega Menu with Template ].
- Mega Menu Number of Columns – Illustrated as 4. incase you enabled mega menu you will get Number of Columns from 1 to 6.
- Menu Item Icon – Illustrated as 5. it allows you to add an icon to your menu item. select from the library.
- Icon Color – Illustrated as 6. it allows you to choose the icon color from the color picker.
- Icon Alignment – Illustrated as 7. select the icon position left or right of the menu item, you can keep it auto.
- Label – Illustrated as 8. type the menu item label to appear beside the link.
- Label Color – Illustrated as 9. it allows you to choose the label color from the color picker.
- Label Background Color – Illustrated as 10. it allows you to choose the label background color from the color picker.
- Add Custom Class – Illustrated as 11. it allows you to add a custom class to the menu item.
- Move – Illustrated as 12. It allows you to easily move the menu item to various positions in the Menu Structure.
- Original – Illustrated as 13. It allows you to view the original page name, which the menu item links to.
- Remove – Illustrated as 14. It allows you to remove the menu item from the Menu Structure.
- Cancel – Illustrated as 15. It allows you to cancel or remove the changes made to the menu item and collapse the panel.